Insulation and energy
How to bring daylight into a loft and keep the roof watertight
In brief
Begin with the room layout, not the symmetry of the elevation: it shows whether light should reach the end of the loft or nearer its middle. A gable window does not interrupt the roof slope, yet its reach in a long interior can be limited; roof windows distribute light differently, while a dormer adds height at the window at the cost of more complex structure and flashing. For every opening in the slope, plan continuity of insulation, an airtight connection from inside and a suitable external collar. Assess glazing size together with shading and ventilation, since more light also raises the risk of overheating.

Where is it best to introduce light?
A window in the gable wall does not interrupt the roof slope and can light the room well at the end of the building. In a long attic, however, its reach is often limited. Roof windows allow the light to be distributed closer to the centre. A dormer can additionally increase the comfortable height at the window, but it complicates the structure and flashings.
It is worth starting with the room layout. A desk, a bed and circulation require different ways of lighting. Several well-placed windows can give more even light than one large one. Openings should not be designed solely according to the symmetry of the façade if they will later be shaded by partition walls or interior fittings.
How should the orientation be taken into account?
The position of the window affects the hours of sunlight and the risk of overheating. Strong sun that is useful in winter can be troublesome in a summer bedroom. The size of the glazing should therefore be assessed together with shading and the possibility of ventilation. A glazing unit with good insulation alone does not solve all summer problems.
External sun shading can limit the energy input before it reaches the interior. Its selection should be planned together with the window, especially with electric control. The power supply and service access must be planned. Routing a cable after the airtight enclosure is complete easily creates unnecessary openings in the layers.
Will the window fit between the rafters?
The spacing of the structure is an important starting point, but not the only dimension. Space must be left around the frame for installation and insulation in accordance with the instructions. If the opening requires cutting a rafter, a structural solution is needed. It must not be assumed that the battens or the window frame alone will take the load.
During renovation, the condition of the timber and the arrangement of the existing layers should also be assessed. The covering should only be removed once the complete set has been prepared. A missing matching collar or insulation components can leave the roof open during changeable weather. This is particularly important with a short work schedule.
How do I connect the window to the metal roofing?
The outer flashing is selected to suit the profile type and height, as well as the roof pitch and the method of window installation. A solution that fits flat sheet metal does not necessarily suit a deep trapezoidal profile. Water must be directed around the frame and onwards onto the covering, without creating pockets or running back under the laps.
The required clearances between the window and the sheets must be maintained. Cutting too tight can impede drainage and servicing, while too large a gap requires a different detail. The underlay layer must be correctly joined beneath the flashing. It is this layer that helps to take up water that appears beneath the main covering.

How to keep heat at the frame?
The space around the window should be filled with insulation suited to the installation solution. It must not be left empty simply because it will be covered from inside by the reveal lining. A thermal bridge at this point can lower the surface temperature and encourage condensation. A continuous connection with the insulation of the pitched section, without gaps at the corners, is essential.
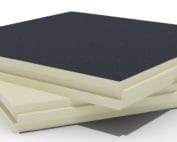
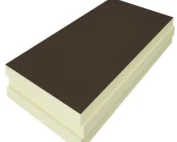
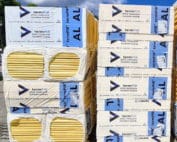
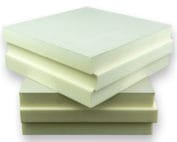
PIR boards offer high thermal performance at low thickness, but the rigid material requires precise fitting. In irregular gaps, a different system component may be needed. Any foam must not be forced in in such a way that it deforms the frame. The assembly should maintain both thermal continuity and correct window operation.
Why is airtightness from the inside a separate matter?
The outer flashing protects against precipitation. It does not replace the connection of the window to the airtight layer on the room side. Warm, moist air should not pass through gaps into cold layers at the frame. Appropriate flashings, tapes and connections to the roof vapour barrier are used for this purpose.
The connections must be made on a stable, prepared substrate. The corners are important, as it is easy to leave a fold or an inadequately bonded section there. The reveal lining should only be installed after these points have been checked. Finished plaster or a finishing board can hide a fault, but will not automatically provide airtightness.
What to check before accepting the attic?
The operation of the sashes, water drainage and the connections of all layers must be checked. It is worth keeping photographs of the insulation around the frame and marking the flashings. The window reveal must not block the required air circulation or impede access for servicing. The finishing method must be adapted to the instructions for the specific window.
Once the building is occupied, ventilation of the rooms is important. Moisture on the pane or reveal can have several causes, from excessive humidity to a break in the insulation. Rather than sealing everything on the outside straight away, the source of the problem should be identified. Checking the surface temperature and the condition of the connections helps to distinguish condensation from a leak.
7 branches. Materials closer to your project.