PIR insulation
Planning insulation board cuts for a loft with a dormer
At a glance
The roof area in square metres is only the starting point for ordering loft insulation boards around a dormer. Board size, laying direction, cut shapes and edge profiles also affect the count. A narrow offcut may fit elsewhere by size but have a different edge after cutting. Draw each slope and each dormer cheek separately, following the specified insulation layout. Here is how to turn those drawings into a whole-pack count and label the cut pieces so the installers can find them.
One drawing per roof slope
Name surfaces clearly, for example garden slope and left dormer cheek as seen from indoors. Add an arrow showing the viewing direction.
Measure distances in the actual plane of the insulation. A horizontal floor plan below a pitched roof does not give the slope length. Use the crew’s measurements for hard-to-reach edges.
Start with the working dimensions
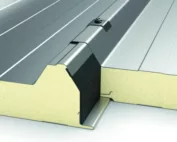
Enter the board designation and dimensions for the chosen variant. For profiled edges, establish which working dimensions the manufacturer uses to calculate coverage after joining the boards.
Draw the laying direction and planned joint pattern. If the system specifies how successive rows must be arranged, incorporate that pattern before trying to reduce material use.
Number whole boards and cuts
Give each full board a number. If it yields two pieces, append a letter to each piece. Record both installation locations so the original board is counted once.
On triangular cuts, mark the facing that must point in the direction specified. A mirrored shape on paper may require turning the board over. Check whether the product and layout allow this.
Where can an offcut be reused?
Assess a piece by its size, shape and remaining factory edge, in that order. A sawn edge at a joint designed for a profiled connection calls for an agreed detail.
Allow for the actual cutting kerf and the condition of the finished edge. If two required widths add up exactly to one board width, trial the cut on a single board before repeating it across a whole slope.
Round up at the end
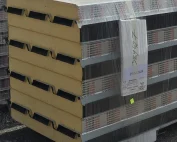
Add up the full boards required across all areas for one type and thickness. List different thicknesses and facings separately. Then round each line to whole packs using the supplier’s pack size.
State the allowance in boards and explain it, for example by noting a section still concealed at survey. You can revise it after measuring. A flat percentage added to every small area may allow for the same losses more than once.
Take the cutting schedule to site
Show the cutting order and both destinations for paired pieces on the site copy. Store them with legible labels where their facings and corners are protected. The right piece can then be found without shifting the whole stack.
After finishing the first dormer cheek, compare consumption with the schedule. If the actual slope angle or dimension differs, revise the second cheek’s layout before cutting more boards.
7 branches. Materials closer to your project.